
MAKING YOUR OWN PERSONAL STAMPS
Photopolymer Print Making with Project X 999 or any Silver Metal Clay
How to make a photopolymer stamp/texture
This process is so easy anyone can do it. Take your drawings or free stock images like Celtic knots, symbols, clip art and more to make your own personalized stamps. Even font can be added to your image. I did all these images below with a simple word program
The main thing to think about is that when you take out a sheet of photopolymer paper (its a vinyl sheet about 1 to 2 mm thick) make sure there is no natural light around. The natural sunlight/UV light is what exposes the photopolymer paper. I supply sheets in a black out, black sleeve. The material can be easily cut with scissors or purchase the 2”x3” pre cut metal back pieces .
Items you will need
- ink jet overhead projector paper (if you have a laser printer you will need overhead projector paper for a laser printer)
- Computer with program to manipulate black and white images
- Photopolymer Paper (it is more like a thick vinyl board - it can be cut) or metal backing photopolymer material for many uses.
- UV lamp
- Piece of wood
- Clear piece of glass
- Binder clips
- Old tooth brush
- Water and wash tray
- For a complete kit click here
Step 1
Working on images to create stamps or textures.
You can work in any creative program you have. Using free black and white images or creating your own.
Here is a sample of one I did using original drawings

I try to get enough to fill up a whole 81/2 x 11 sheet so as to not waste the special overhead projector clear paper.
Everything in Black will be raised when you put metal clay onto the finished stamp. Wording will have to go backwards on the photopolymer paper.
No need to do your words backwards as you can flip the transparency

Step 2
Preparing the image to make stamp.
- select the drawing you want and cut it out from the over head projector sheet

Step 3
While in low light, non UV light room,
Take out the photopolymer vinyl and cut the size you will need

The photopolymer vinyl will have a plastic cover on the side that we will be using, the activating side. Here you will put your cut out image on the activated side. If using words this is where you will flip the transparency so the words are backwards. Once you have it positioned correctly put them both onto the piece of wood provided. Next put the glass on top of the stack and used the binder clips provided to hold everything in place. This is important so that when under the UV light the black area will be protected (this will eventually wash away and become the raised part in your design).

Step 4
Take your sandwiched design and put it under the light

Turn your light on for 30 seconds.

Turn it off and then take the clips and everything off. If you hold your photopolymer paper up to the light you will be able to see your image on it.

Step 5
Wash out.
Next you will get some warm water about 4 cups in a container. Make sure you will not be using this container in the future. Put your plate in the water and begin to rub your fingers over top of the design. You can use a tooth brush to brush your plate and get it as clean as you can. Here I am using a tooth pick to get into smaller areas.


Issues-
A. The design is washing out.
- you may have unintentionally exposed your plate to UV light. Try it again.
- You may have to use less time under the UV light.
B. Too much of my design is washing away, the image is not sharp, breaking of image
- Water may be too hot, or you are soaking it too long in the water
- You may need to add more time to exposure under the UV light.
After you have cleaned the plate to your satisfaction let it dry. Either air dry or you can blow dry for faster completion. Then you will put the plate back on the wood with glass on top and the binder clips. Put under the UV light for one minute. This will totally cure your stamp so that it is ready for metal clay.
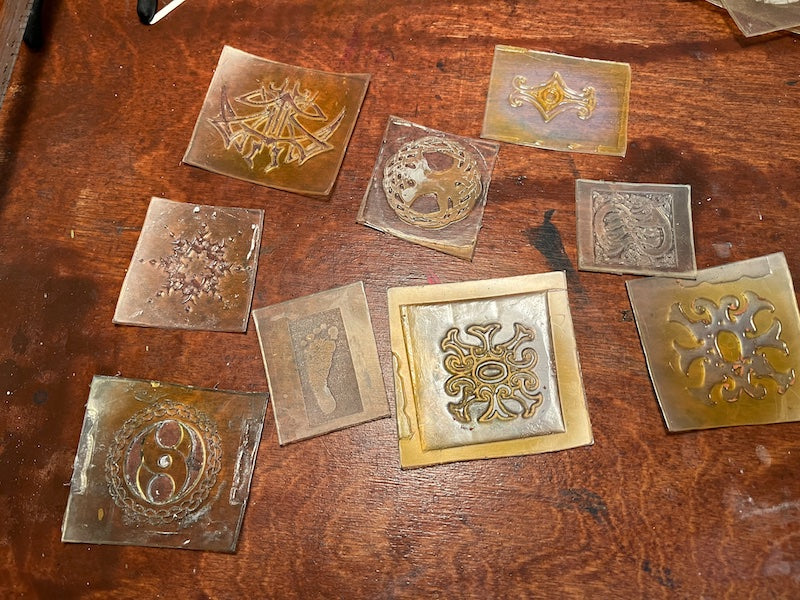
Use your stamp with metal clay as you normally would. Below is how it looks greenware

After Firing

With Patina

I hope you enjoyed learning about making your own stamps.
2 Responses

Leave a comment
Comments will be approved before showing up.
Nash
June 20, 2024
Thank you thank you thank you! I’m so excited to try this stuff, I saw a tutorial about stamp making on instagram and I’ve been looking to try photopolymer paper ever since. So glad you carry it now and this tutorial is amazing!